Most Avilla homeowners underestimate site drainage and soil conditions, so you risk costly failures and unsafe walkways if you skip proper evaluation; you should verify grading, utilities, and material suitability, and consult a licensed contractor to avoid project delays and structural issues, while planning for long-term durability and curb appeal to ensure your investment pays off.
Key Takeaways:
- Underestimating budget and timeline – hidden site issues, material cost changes, and contractor availability often push projects over budget and schedule.
- Neglecting drainage and grading – poor water management causes pooling, erosion, and premature failure of hardscape elements.
- Skipping permits, HOA rules, or professional planning – lack of approvals or a detailed site plan leads to rework, fines, or noncompliant installations.
Understanding Hardscape Projects
Definition of Hardscaping
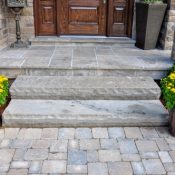
When you scope a hardscape project, you deal with the built, non-living elements of the yard-patios, driveways, walkways, steps, retaining walls and outdoor kitchens-rather than plants. These features carry loads, direct water, and alter grades; for example, a retaining wall over 4 feet typically requires engineered design and permits. You should plan for subgrade preparation, load paths, and drainage from the start to avoid costly rework.
Common Hardscaping Materials
Concrete, interlocking pavers, natural stone (like bluestone), brick, gravel and decomposed granite are the most used materials; each has specific installation needs. Pavers for patios are commonly 60-80mm thick, while driveway pavers trend toward the upper range. You can also use porcelain slabs, timber sleepers, gabion baskets, and segmental retaining wall blocks depending on aesthetics and budget.
Concrete is economical but prone to cracking unless control joints and proper subbase are used; pavers offer flexibility and easy repairs, often requiring a 4-6 inch compacted aggregate base plus a 1″ bedding sand. Permeable pavers need a deeper stone reservoir-typically 8-18 inches-to manage runoff. If you ignore drainage, expect frost heave and settlement, so include drainage strategies and geogrid where walls exceed recommended heights.
Planning Your Hardscape Project
When you plan, factor in permits, access for equipment, and HOA timelines: permits often cost $50-$500 and HOA approval can take 2-6 weeks. Map material deliveries and staging to avoid double handling heavy pavers. If your driveway access is under 10 ft wide, expect higher labor costs or equipment rental. Prioritize drainage and grading in the schedule, since correcting poor drainage after installation can add 20% or more to the final bill.
Importance of Site Assessment
You should assess soil type, slope, drainage, and underground utilities before design: sandy soils typically need 4 inches of compacted aggregate, while clay often requires 6-8 inches. Mark utilities by calling 811, because hitting a gas or water line is both dangerous and expensive. For slopes over 5%, plan for terraces or retaining walls to prevent erosion and uneven settling.
Setting a Realistic Budget
Budget using itemized estimates: expect paver patios around $15-35/ft², retaining walls $25-65/ft, and labor to be 40-60% of the total. Build a contingency of 10-20% for surprises like poor soil or hidden utilities. Compare at least three bids and verify line-item breakdowns so you can trim scope (materials, size, decorative elements) instead of quality.
For example, a 300 ft² patio at $20/ft² equals $6,000; add 15% contingency ($900), a permit (~$150), and upgraded drainage (~$800) for a realistic project total near $7,850. You can lower costs by choosing unit pavers over natural stone or reducing complexity, but expect core site prep and drainage to remain non-negotiable expenses.
Design Considerations
Assess grade, soil, utilities and drainage immediately, since those factors dictate feasibility and cost. If your yard lacks a 1-2% slope away from the house, water will pool-poor drainage wrecks hardscapes. Call before you dig to locate underground lines, plan for permits, and carry a 10-20% contingency for surprises. Match material lifespan to budget-concrete pavers often last 30-50 years while stamped concrete typically lasts 20-30-so your upfront choices affect long-term maintenance and value.
Choosing the Right Aesthetic
Align materials and patterns with your home’s style: a modern ranch works with large-format concrete pavers and muted greys, while a Craftsman benefits from irregular flagstone and warm earth tones. Factor scale-larger pavers reduce maintenance and joint visibility; cobbles add texture but increase upkeep. Note cost differences: natural stone is often 20-50% more expensive than manufactured options, yet can raise perceived resale value when matched thoughtfully to siding and roof colors.
Functionality vs. Beauty
Prioritize intended use: drive surfaces need an 8-12 inch compacted base, patios 4-6 inches, and heavy equipment requires thicker subgrades. Permeable pavements can reduce runoff by up to 90%, but demand routine maintenance like vacuuming joints and checking infiltration. Integrate lighting, conduit and gentle slopes for universal access early, because aesthetic choices should never compromise structural or safety requirements.
Practical hybrids often provide the best outcome: place durable concrete pavers on drive aisles and reserve decorative stone or porcelain for seating zones. Specify a 12-inch aggregate base under vehicle paths and 4-6 inches under pedestrian areas to prevent settling; add edge restraints and correct joint sand to withstand freeze-thaw cycles. Doing this avoids uneven surfaces, reduces long-term repair costs, and preserves the look you designed.
Common Mistakes Homeowners Make
Too many projects stall because you skip site evaluation and assume a simple install; poor drainage, hidden utilities, and inadequate base prep routinely add time and money. Contractors often find compacted clay, old footings, or roots that force redesigns, pushing costs up by 20-40%. When you fail to plan for grading, lighting, and maintenance access, the finished hardscape looks good on day one but underperforms within a season.
Underestimating Costs
When you budget by material alone you miss major line items: excavation, geotextile fabric, 4-8 inches of crushed stone base, edging, and compaction equipment. Typical installed ranges are about $8-$25 per sq ft for pavers and $25-$60 per sq ft for retaining walls; site prep can be 20-40% of total cost. Unexpected soil issues or tree root removal commonly add $2,000-$10,000, so pad your numbers accordingly.
Ignoring Local Regulations
Assuming you don’t need permits or approvals is risky: many towns require permits for patios, retaining walls, and drainage work, with fees from $50-$500 and potential fines or stop-work orders if you proceed without them. HOAs often limit materials, colors, and maximum patio size-violations can force costly removals. You should verify setbacks, floodplain rules, and utility easements before crews arrive.
Start by contacting your municipal zoning office and checking FEMA floodplain maps; historic districts may add months to approvals. Always call 811 to locate underground utilities and request HOA covenants in writing-some associations cap impervious surface at 20-30% of lot area. Permit review typically takes 1-6 weeks, so factor that into your schedule and contract to avoid delay penalties or redo costs.
Hiring Professionals vs. DIY
Deciding whether to hire pros or tackle the job yourself hinges on scale, risk, and budget. Small patios cost $12-30 per sq ft installed; a 1,000 sq ft job can run $12k-30k, so you may save 30-50% by doing labor but face hidden costs for equipment and mistakes. Contractors handle permits, drainage, and offer 1-5 year warranties; working alone exposes you to utility strikes and heavy-equipment hazards.
Benefits of Professional Help
Professionals bring design expertise, site grading, and proper base construction-typically 4-8 inches of crushed stone compacted to >95%-which prevents settling and saves long-term repair costs. They navigate permits, coordinate inspections, and carry liability insurance, reducing your exposure to claims. Warranties of 1-5 years and access to heavy machinery let you complete projects in days rather than weeks; for example, a 500 sq ft paver patio often finishes in 2-3 days with a crew.
When to Consider DIY
Opt for DIY on small, non-structural tasks-garden paths, fire-pit surrounds, or patios under ~100 sq ft-when you have basic tools and time; you can cut labor costs by ~30-60%. Avoid major excavation if you lack experience, since hitting underground utilities or improper drainage can create expensive failures. Permit rules vary, so check local codes before you start.
When you DIY, follow these specs: establish a 4-8 inch crushed-stone base, slope surfaces at about 1/8-1/4 inch per foot for drainage, and use geotextile fabric under fill where soils are loamy. Rent a plate compactor ($60-120/day) and expect 1-3 days for a 100 sq ft patio. Install a secure edge restraint, sweep polymeric sand into joints, and seal if desired; small mistakes in base depth or slope cause uneven settling and water pooling.
Maintenance Expectations
Hardscapes need scheduled upkeep: you should sweep monthly, pressure-wash at 1,200-2,000 psi as needed, and plan to reseal pavers or natural stone every 2-5 years. Expect to budget roughly 1-3% of installation cost per year for maintenance or save for larger repairs every 8-15 years. Check drainage after heavy rains-standing water causes paver failure. For planning pitfalls see Mistakes to Avoid When Planning Out Your Hardscaping Project.
Long-Term Care for Hardscapes
You should expect joint sand replacement every 5-10 years, occasional spot-replacement of individual pavers rather than full repaves, and professional resealing for porous stone every 3-5 years. In one Avilla case study a homeowner who resealed on schedule preserved color and avoided a $6,200 repave after eight years; the neighbor who skipped resealing paid that amount. Also monitor edging and a 2% slope away from structures to prevent long-term erosion and settling.
Seasonal Considerations
In winter avoid sodium chloride on sensitive surfaces and use calcium chloride or sand for traction; freeze-thaw cycles can cause heaving and cracks, so clear melting snow promptly. In spring inspect joints for 1/8″-1/4″ sand loss and reseal if UV fade exceeds 10%.
During fall start by removing leaves weekly to prevent organic staining and moss growth; leaves trapped in joints accelerate binder breakdown. In winter lift planters and furniture to prevent trapped moisture and use ice-melt rated for your material-concrete tolerates sodium chloride poorly while bluestone and limestone do not. After thaw, walk the surface and test 3-4 random joints for sand compaction; if loose, broom in polymeric or kiln-dried sand and consider professional joint stabilization. Proper seasonal action can extend a hardscape’s functional life by 5-10 years and avoid costly structural repairs.
Final Words
Most hardscape problems in Avilla start long before the first paver is set. Skipping proper site evaluation, underestimating drainage and base preparation, ignoring permits, or budgeting too tightly almost always leads to settling, pooling water, and expensive rework. When you plan correctly from the beginning by assessing soil conditions, managing water flow, choosing the right materials, and building in realistic timelines and contingencies, your hardscape becomes a long-term asset instead of a recurring headache.
The smartest approach is to treat hardscape installation as both a structural and design project. Proper grading, a well-compacted base, and thoughtful material selection ensure your patio, walkway, or retaining wall performs through Indiana freeze-thaw cycles while still delivering the curb appeal you want. Investing a little more time and expertise upfront can save thousands in repairs and extend the life of your hardscape by years.
If you want your Avilla hardscape project done right the first time, Diamond Homescapes can help. Our Fence contractor team handles site evaluation, drainage planning, permitting guidance, and professional installation to ensure your hardscape is built for durability, function, and lasting value. Contact Diamond Homescapes to schedule a consultation and turn your outdoor vision into a solid, worry-free investment.
 When it comes to enhancing the overall appearance of your home, curb appeal plays a crucial role. It not only creates a positive first impression but also increases the value and desirability of your property. While landscaping is often the first thing that comes to mind when discussing curb appeal, hardscaping is equally important. Hardscaping refers to the non-living elements of your outdoor space, such as pathways, patios, and retaining walls. Let’s delve into the reasons why hardscaping is vital for enhancing curb appeal.